Mastering WordPress Installation: A Step-by-Step Guide to Manual Setup

Embarking on the journey of website creation with WordPress can be both exciting and daunting, especially if you’re new to the platform. While one-click installation methods are convenient, mastering the art of manual installation offers invaluable insights into the inner workings of WordPress. In this comprehensive guide, we’ll walk you through the process of manually installing WordPress and configuring it to kickstart your online presence effectively.
Understanding the Importance of Manual Installation
While one-click installation options provided by hosting services offer convenience, opting for manual installation provides several distinct advantages:
- Deeper Understanding: Manual installation allows you to delve into the intricacies of WordPress, gaining valuable insights into its core functionalities and structure.
- Enhanced Troubleshooting Skills: By installing WordPress manually, you develop the skills necessary to troubleshoot issues and resolve them efficiently, empowering you to tackle any challenges that may arise in the future.
- Customization Flexibility: Manual installation grants you greater control over the setup process, enabling you to customize your WordPress installation according to your specific requirements and preferences.
Preparing for Manual Installation
Before diving into the installation process, it’s essential to gather the necessary tools and resources:
- File Transfer Protocol (FTP) Client: Utilize FTP clients such as FileZilla for seamless file transfer between your local machine and the server.
- Latest Version of WordPress: Download the latest version of WordPress from the official website to ensure compatibility and access to the latest features and security updates.
- Text Editor: Opt for a dedicated coding text editor like Atom to facilitate editing of configuration files and ensure optimal functionality.
Step-by-Step Manual Installation Process
Step 1: Create a New WordPress Database and User
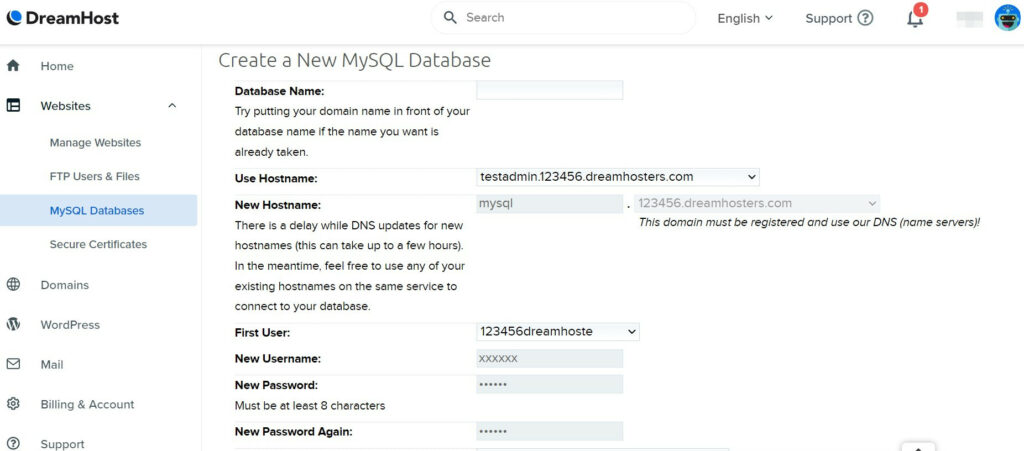
- Log in to your hosting account and navigate to the database management section.
- Create a new MySQL database and user, ensuring to note down the credentials for future reference.
Step 2: Configure WordPress’ wp-config.php File
- Access the downloaded WordPress folder and locate the wp-config-sample.php file.
- Edit the file to include the database details you previously created and save it as wp-config.php.
Step 3: Upload WordPress Files to Your Server
- Connect to your server using the FTP client and navigate to the root directory.
- Upload all WordPress files from your local machine to the server’s root directory.
Step 4: Run WordPress’ Installation Script
- Access your domain followed by /wp-admin/install.php in your web browser to initiate the installation process.
- Follow the on-screen prompts to set up your WordPress site, including site name, admin credentials, and language preferences.
Step 5: Finalize and Test Your Installation
- Upon successful installation, access the WordPress dashboard to begin customizing your site’s appearance and functionality.
- Install essential themes and plugins, and familiarize yourself with WordPress’ features and functionalities.
Conclusion: Empower Your WordPress Journey
Mastering the manual installation of WordPress equips you with invaluable skills and knowledge essential for building and managing successful websites. By understanding the intricacies of WordPress installation, you gain confidence in troubleshooting issues, customizing your site, and harnessing the full potential of the platform. With this comprehensive guide, you’re well-equipped to embark on your WordPress journey and elevate your online presence with ease.


